Lowering
-
Updated June 4, 2009
Feel free to email me with any questions you may have, see
email address at top of page.
-
The links, risers, and
side stands are made by Ron Drake. The lowering links are made of
aircraft grade aluminum and his side-stands are cut down OEM stands.
He is also selling risers (I have risers on mine, no modifications needed to
install them). The side stand really looks good.
Bonus round for all you Engineers / Quality Control gurus out there, Ron is
a Digital Six Sigma Black Belt:
ron_drake93@yahoo.com
***Click on thumbnail images to
view high resolution photos***
|
This modification will lower your bike 1.5 inches. OK, you'll need a set of Allen wrenches, box
wrenches, and socket set. Not to
worry, this is fairly easy.
Note: You do not
need to remove any body work.
First put the bike on the center stand.
You may need a friend to help make it easier although you could do this
by yourself. But why not hang out with a friend? |
|
|
 |
 |
 |
 |
|
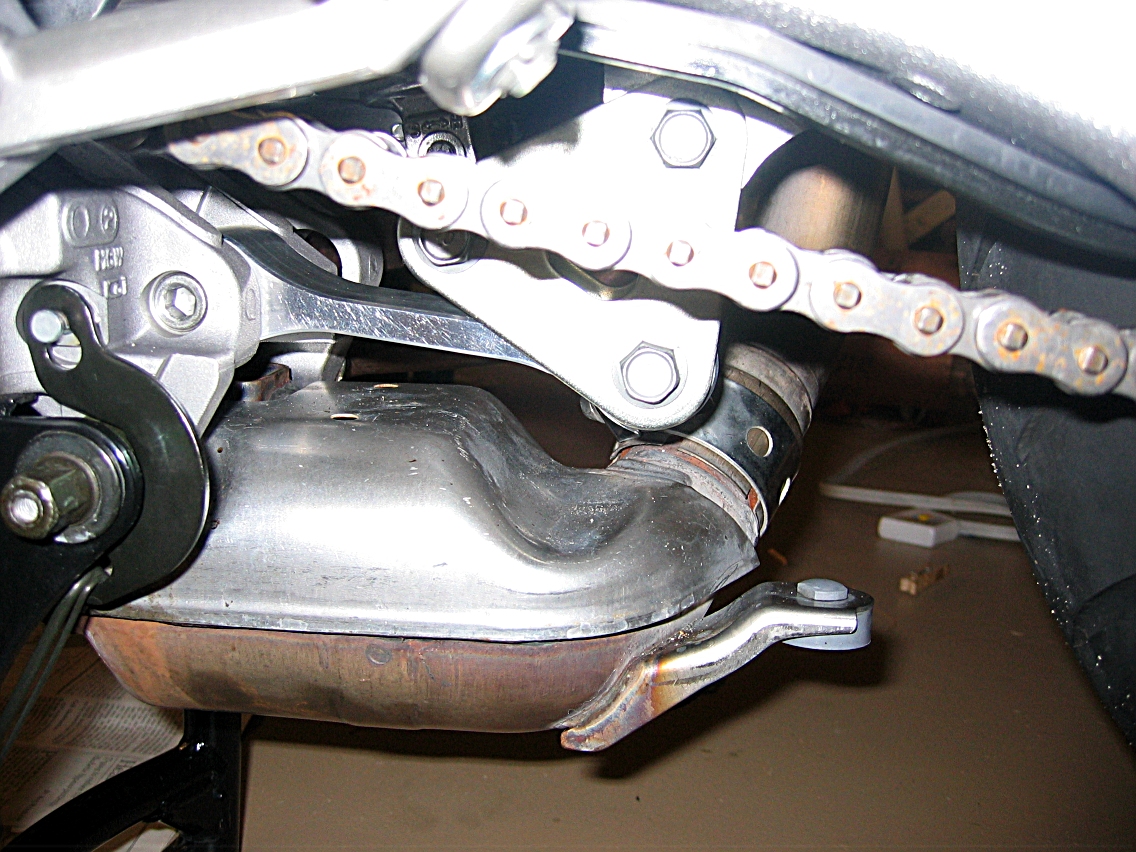
Now we get to the meat of
this modification. Above is the original dog bone. |
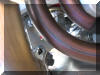
This is a little out of focus, but you want
a box wrench on the back nut and use an 8mm Allen hex socket on a ratchet to loosen
up the bolt. |
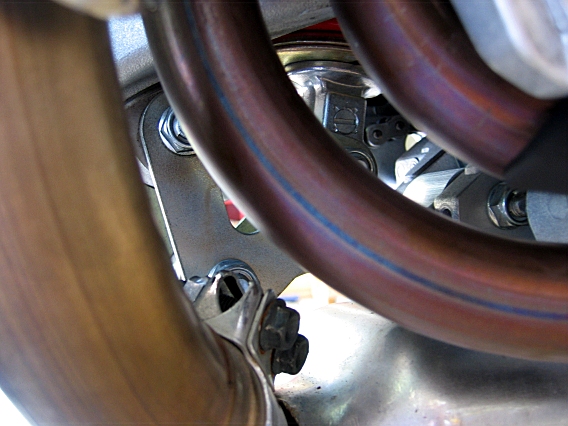
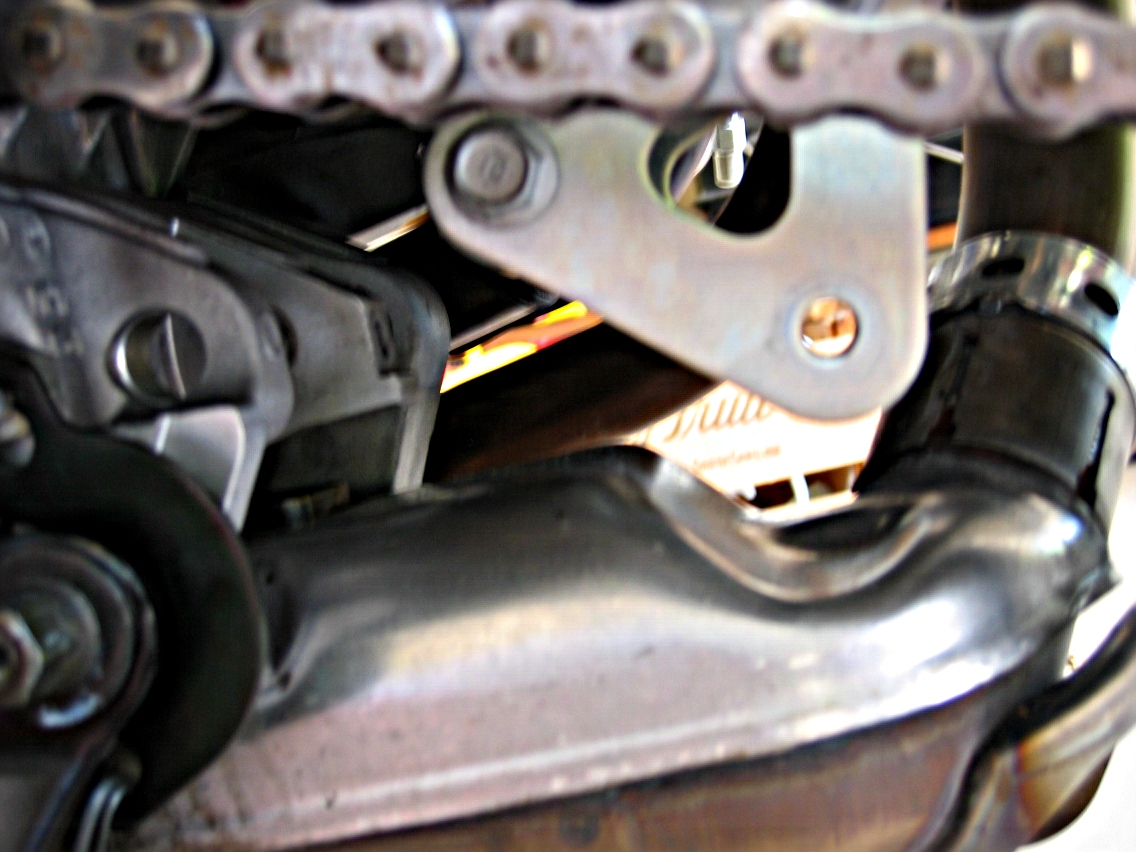
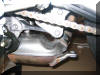
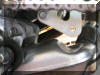
Picture of the two nuts
on the back. The first is at the bottom of the triangle behind the
muffler bolts in the foreground. The second is to the right
between the two headers. Use a box wrench to hold these nuts in place
while you use sockets to remove the 14mm bolt and 8mm Allen bolt. |
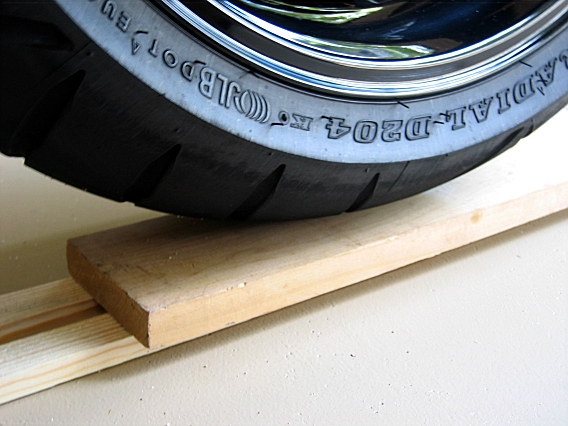
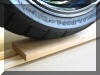
Before you remove the bolts, put boards
under the rear wheel as the wheel will drop down. You will also
use the boards as a lever to move the wheel up to connect the new,
longer dog bone. |
|
|
|
 |
 |
 |
 |
|
Dog bone removed. Just place the new
one in and bolt up the left one first (the one that attaches to the
motor). Then have someone lift the
board until the right hole meets the dog bone hole (the one at the
bottom of the triangle). Put the bolt
through and tighten them down to specs. |
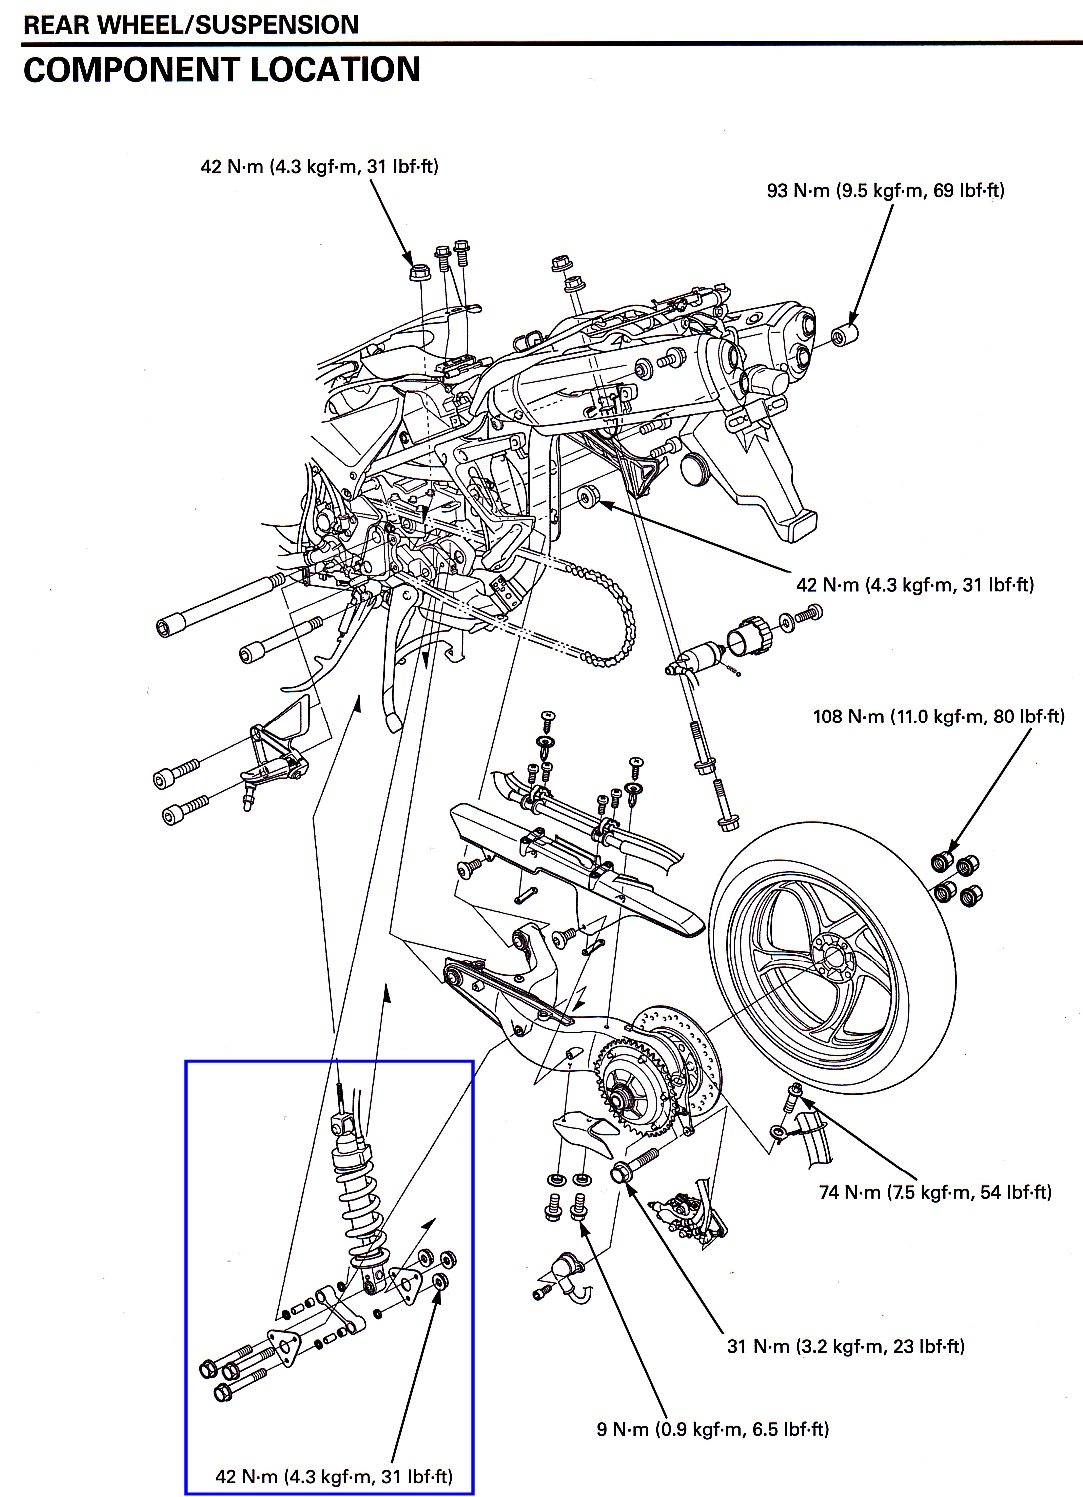
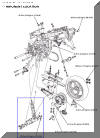
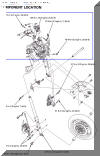
Here are all the torque specifications for
the rear. The blue box is the area of focus. |
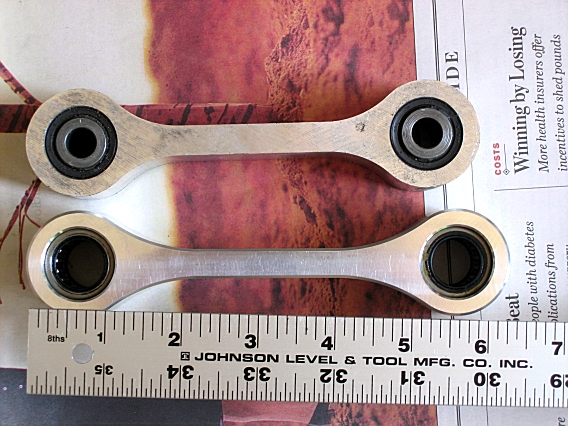
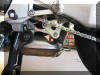
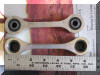
Comparison of the two dog bones, Honda's on the top.
Note the collars in the top dog bone. Push those out and put them
in the new dog bone. |
Here is a tip, take two canvas bags and
fill them each with about 30 pounds of weights, then hang them off the
struts for the saddle bags. This makes the bike's weight neutral
on the center stand and will make lowering the front easier or have a
friend lean on the tail. With the
bike on the center stand and the weights on the back saddle bag mounts,
loosen the bolts for your clip-ons. Then loosen the four pinch
bolts on the fork tube of the triple tree. You will want someone to hold the back so it doesn't drop
down. Then the person in the back, in my case my wife (thanks,
Honey), can pull up on the back end lowering the front. If you go
too low, just push down on the back end. The extra weights you
added makes it really easy. Just use a caliper to measure 68mm of
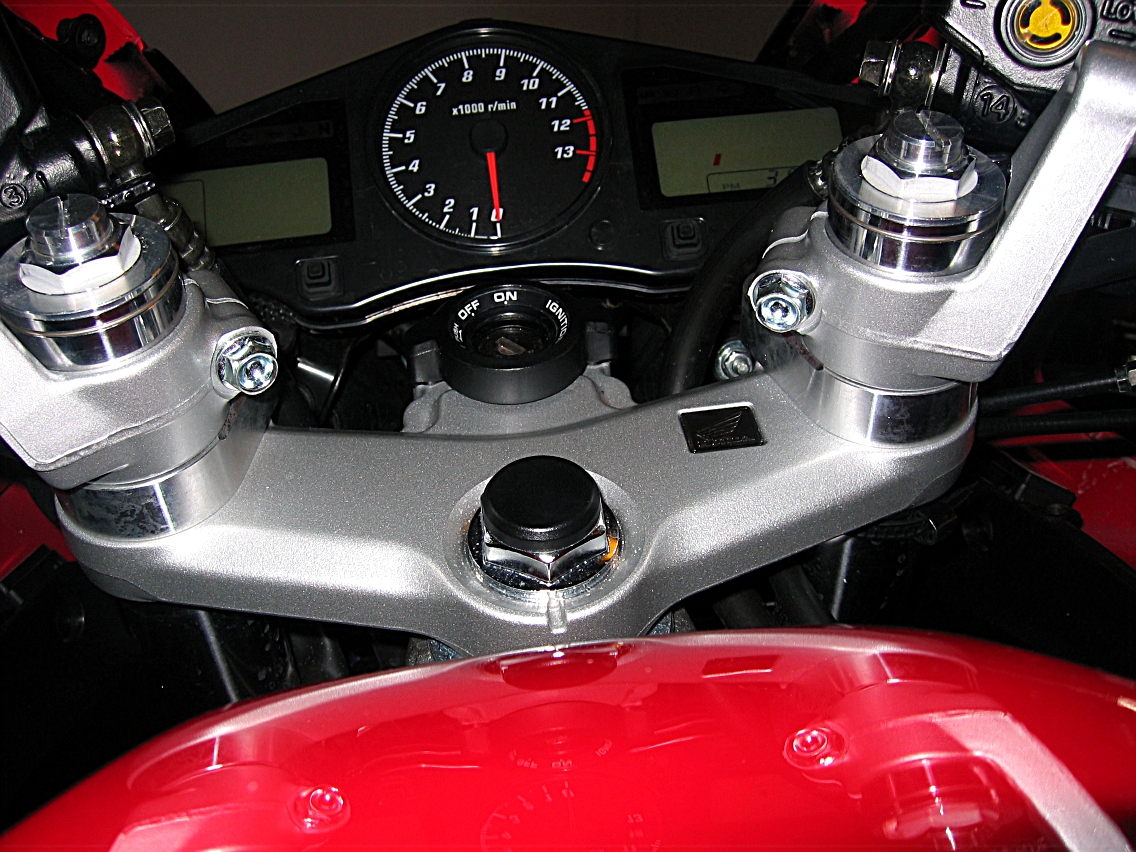
fork tube above the top triple clamp. |
|
 |
 |
 |
 |
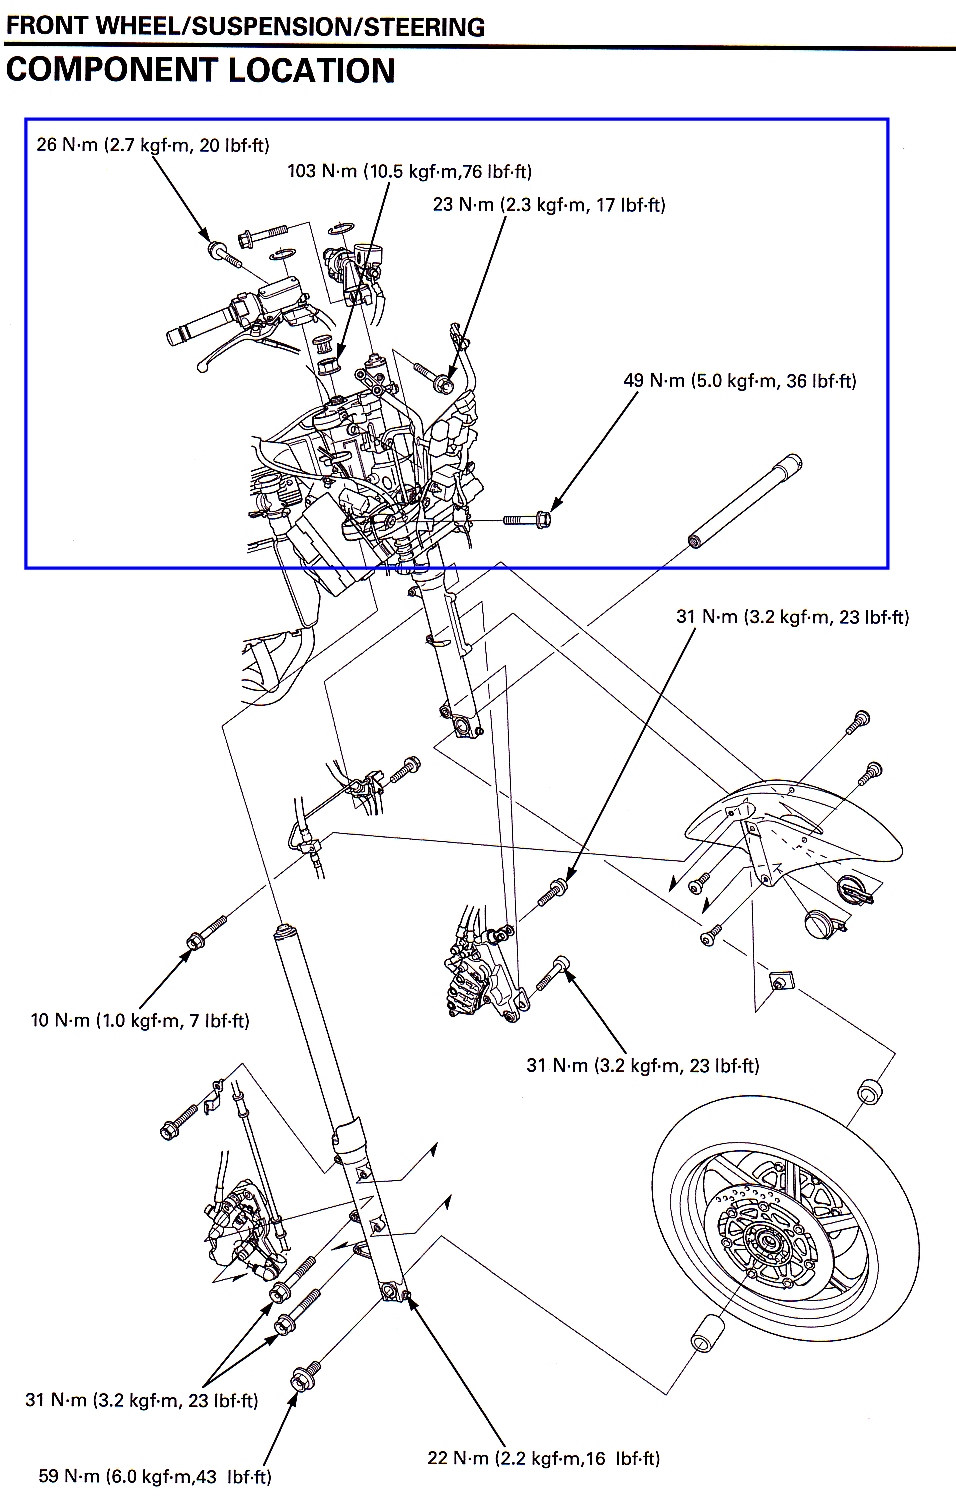
| Your stock
forks extend 41mm above the triple clamp. Raise up the forks to
about 68 mm, this still gives you 4.3 inches of travel for the forks
before the lower triple clamp, which is the max front suspension travel.
Now there are two black metal hose guides under the oil cooler on the
left and right, just to be safe push them upward, they'll bend up.
This will make sure they don't hit your tire guard if you fully bottom
out your front suspension. |
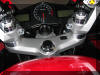
Finished with
risers. |
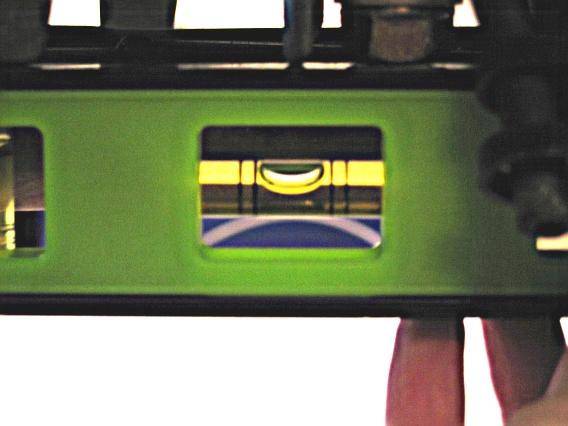
Here is a little trick... On the bottom of
the oil pan is a fin that protects the drain bolt. There are two
other fins in front and in back. Take a level and put it across
those three points, they are all the same length, and check to see if
your lowering job is level. |
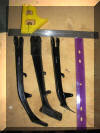
Side stand: Take the spring off,
a pair of Channel Lock pliers work well. Then remove the 14mm nut.
Then use a 8mm wrench to remove the position sensor bolt. Then
remove the 14mm bolt. Repeat in reverse for the new one. You
will need to remove the Allen bolt for the fairing right by the side
stand so you can flex it out of the way to put the side stand sensor
back in place. Ignore the side stand in the middle. Ron's is
the short one on the right and stock is on the left. |

Enjoy your new longer legs.
One last thing, you will need to adjust your pre-load on the rear shock
as the default setting before being lowered will now have no tension on
the shock. For the 2002+ ABS models you will need to tighten the
knob 6 - 7 turns once you feel tension to be set back to default stock
setting (adjust accordingly from there). For the non-ABS models
you will need to get your wrench out and adjust the pre-load as well.
Total Time: ~2 Hour
Total Cost: ~$365.00 (Lowering
Link, Risers, and side-stand)
|
|
|